I have been using a document camera in my classroom for several years and found it to be invaluable for certain lessons. It is also environmentally friendly and cost-effective. What used to be a page for each student is now projected to a screen where they all can see it.
1. Science Classes Come to Life
A document camera allows you to present a demonstration for the whole class at the same time. You may be showing the parts of a plant, different types of rock or a chemical reaction. The image is larger than life, which makes it better than individual observation. My students ask questions during the presentation which not only saves time but allows for individual and group understanding.
I can take photos of the presentation and use them later in an identification quiz. I can also record the lesson to be used the next year or as a review for my current students.
2. Candling Baby Chicks
Every year I set up a chick-hatching incubator and hatch six or seven chicks. It’s a process that has many steps and my students learn each step and love to see the results. That is fluffy little chicks. Candling is one step that helps us know if a chick has stopped developing inside the egg, without disturbing a healthy chick.

With my document camera all the children can see inside the egg during candling. I darken the room as much as I can and put the egg and flashlight under the camera. This is where it gets good. Every child can see if the chick is developing, if there is a crack in the shell or if there is no development. This is so much better than having each child look at the egg because I can point out what they should be looking for, and they all can see it.
3. Reading and Writing
Reading aloud while students listen and follow along with the text is one of the best methods for teaching language. My document camera completely revolutionizes this process because I can project the text for all to see while I read. It’s great because all the children can see the pictures clearly, which saves time and adds interest. The zoom feature is useful at this point for showing the illustrations. I also use it to demonstrate handwriting, and the students can look and copy. This also reduces the cost of hand-outs and textbooks.
The document camera is also a great way to demonstrate note-taking, handwriting, punctuation and sentence structure, so the whole class can get the same lesson at the same time. It’s also an easy way to model alphabetical order related to dictionary usage. These activities all reduce the number of textbooks you need because one book is enough for the whole class.
4. Math and Manipulatives
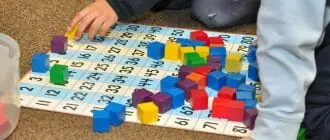
Manipulatives are used for just about every mathematical operation from simple addition to algebra. They are also useful for pattern recognition, counting, sorting and building structures. With my document camera, I can use the manipulatives along with my students. I can give instructions graphically rather than only verbally and they watch. Then they get started on their own. From teaching shapes and colors in kindergarten to teaching fractions in fourth grade, the document camera makes the lesson more exciting.
I project a six-inch segment on the screen and ask the students to divide it into six equal parts or sixths. One child comes up to the projector and measures out one inch at a time until she divides the strip. Everyone can see how it’s done and gets a chance to solve a different problem.
My students can watch me count money, compare fraction strips and use place-value blocks. I teach borrowing and carrying and explain multiplication and division, so the whole class can see. My students have a math workbook. I can put the page I want them to complete on the screen and we all do the first two or three problems together. Then they complete the page.
5. Review Quiz Answers
With my document camera, it’s very easy for students to see how they did on a quiz. They have their answers at their seats and the quiz is projected on the wall. I give the correct answer to each question and we have a class discussion. They can ask questions to better understand why they got it wrong or to learn more because they got it right.
I prefer my students to learn from quizzes rather than be graded on how many they missed. A large projection of the quiz and any photos or graphics that go with it creates a much better tool for memory than plain text and a photo in a book. Some quizzes may have videos that the kids really love.
6. Geography
One of my favorite uses for my document camera is virtual field trips. It’s a real treat for all of us to visit the Grand Canyon or fly around the Statue of Liberty. I think the biggest favorite is watching a volcano erupt.
For geography, learning to read a map is very important, and with my document camera I can project all kinds of maps. Mine has a connectivity feature, so I can go on Google Maps and we can take a live tour of any place on Earth. The same is true for learning how to read graphs. It’s much more effective when the whole class can see the image and listen to the explanation.

I make sure to have a virtual tour every week and my children look forward to it. They ask questions and we research to find the answers. For example, why do some volcanoes throw lava into the air and some only smoke? What happened to the habitat of the orangutan? What is the use of the little slits in the castle’s walls?
7. PowerPoints
You can create a PowerPoint lesson for math, science, language, geography, history and more. PowerPoints are useful when students need to retain complex material with text, graphics and animation. I choose simple text, photos and graphics to make each slide look great and give just the right amount of information. I use this for introducing a subject and save the PowerPoints to use every year as appropriate.
My students also make PowerPoint demonstrations and show them to the class. This is usually a group activity with three or four students in a group. They need to divide the research and work together to create the presentation. A few of the things they have presented are:
- Instructions
- Games
- Quizzes
- Information
- Slideshows
- Reporting of class or school events
8. Student Interactions
When the children are in charge, and present something to the whole class with the material they have created or gathered, the energy and motivation levels soar. They share their stories with the class, take turns working out math problems and display problem-solving strategies.

With the digital camera, I can take photos of the student’s work and keep files for each child. These portfolios can be used to show the administration about your lessons or show the parents during parent/teacher conferences. If you have student-led conferences, they can not only show their work to their parents but also show off their skills with the camera. If a child moves to another school, their file can go with them.
9. Arts and Crafts
For complicated, multistep projects I can demonstrate everything and all the students can watch. Cutting, gluing, folding and color choice are easy to teach and my students love to see me do it first and then try it on their own.
If you are a good artist, or even if you aren’t, you can demonstrate the use of color and painting techniques. The camera can capture and save your student’s best work. It’s an easy and convenient way for them to take home their drawings and paintings without becoming damaged.
10. Showing Detail
While not a microscope, the document camera does serve to enlarge objects for inspection. This is especially useful when studying insects and the different sections that identify an insect and an arachnid or the Fibonacci spirals in pinecones, shells, compound flower petals and fossils.

Another activity that requires viewing detail is the magnetic field. I put a magnet under a thin paper plate and sprinkle small iron filings on the plate. They immediately show the shape of the magnetic field. It’s also good for showing how a magnetic compass works. Each child gets a turn to move the magnet and watch the filings move or manipulate the focus of the compass. It’s a bit time-consuming but it only takes one lesson for the children to remember all the scientific vocabulary. I also use this demonstration when teaching the magnetic poles of the Earth. Check out this list if you’re still looking for the document camera.
This Is Just the Beginning
These 10 activities that I do with my document camera are just the tip of the iceberg of what is possible. When my students use their tablets the whole class can see and participate in the quiz, game, video or demonstration. If you have special uses for your document camera, be sure to add them to your digital teaching portfolio and let me and my readers know about them. We are always looking for new activities and teaching methods to inspire and motivate our students.
Last Updated on July 25, 2022 by Emily
- Facebook9
- Twitter21
- Pinterest67
- 97shares


